Saturday, November 28, 2009

Creating a Hand-Stamped Christmas Ornament


Step 1. Choose a photo and coordinating stamps.

I’ve used a photo of my niece, Jessie. For the stamps I picked out a pine branch and a ribbon bow. Large simple objects or long border stamps work best.

Step 2. Prep the clay.

Soften a small package of polymer clay by kneading it in your hands. Roll out a slab of clay large enough to cover the stamp. You can use a clay roller, a rolling pin, or an old pasta maker.

Step 3. Create the frame.

I find you get the best impression if hold the stamp in your hand and press the clay into it and then peel the clay back to reveal the pattern. Trim away the excess clay. Repeat until you have enough pieces to create the frame. Add a piece of clay with a hole in the top for the hanger.


Step 4. Bake the clay.

Place the frame on a baking tray covered with parchment paper or a light sheet of cardboard. If you want some dimension in your finished frame then add some small pieces of tin foil wherever you want to add curves.

Loosely cover the tray with some tin foil and place it in a cold oven. Set the oven temperature to 270 degrees. Heat the clay pieces for 10 minutes and then turn the oven off. Allow the clay to cool in the oven.


Step 6: Add a sealer.

The clay frame can be used right out of the oven, or you can add a finish to make it shiny. It you want to use sealer, make sure it is approved for use on polymer clay.

Step 6 Assemble the ornament.

Cut out a back slightly larger than your photo out of card stock or felt and glue the photo to it. Glue the frame to the front and you are done!

Monday, November 23, 2009

Translating cake decorating skills


From Icing Roses to Clay Roses
It’s funny how a skill you learned for one purpose can carry over into another medium. Take for example creating roses. When I was growing up my mother taught me how to make roses from icing.

The consistency of the icing is the key to rose success. Too firm and it gets stuck in the tip causing your bag will burst open. Too soft and your rose petals melt into a big heap. Yet even with its temperamental mood, icing is a forgiving medium. In fact, I look forward to making mistakes because you get to eat those.

To make a rose you squeeze out a blob of icing on the center of the metal nail. Then you add petals at the top—small ones first then slowly increasing in scale as you work your way around.

It is a strangely relaxing activity. The soothing smell of vanilla couples with the familiar rhythm: squeeze-turn, squeeze-turn, squeeze-turn, and soon a flower appears right before your eyes.

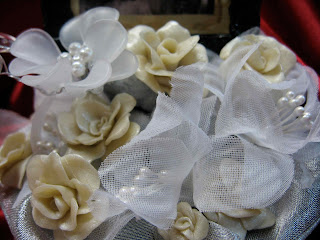
When I started to make clay roses, I tapped into those cake-decorating skills I learned long ago. I start with a cone shaped blob and add the petals in the same manor that I use for icing roses. Sure, this activity isn’t as tasty, but it is far less fattening.

Mom’s Icing Recipe
1 ¼ cup shortening
¼ tsp. salt
2 lbs. confectioner’s sugar
4 tbsp. flour
¾ cup water (may need less for roses depending on humidity)
3 tsp. vanilla

Tuesday, November 17, 2009

Winter Wedding Cake Topper


I wanted to greet the upcoming winter season by creating a winter-themed wedding cake topper to sell in my Etsy shop. I’ve been tossing around some ideas for about a month, but nothing stuck until I saw a digital collage sheet offered by fellow Etsy shop owner Rainebeau.

This delightful snowman couple is from her vintage postcard collection. As soon as I saw it, I knew that with a few small alterations, I could transform them into a bride and groom on the way to their honeymoon escape.

The snowflakes are hand-stamped into clay, and I carefully cut each one out with a craft knife. While the process was time consuming, it allowed me quiet time to meditate on each shape. And just like with the real thing, no two snowflakes came out the same.

Wednesday, November 11, 2009

40's style bath redo art work


For day 11 of Art Every Day Month, I'm doing some photo editing. As I mentioned in an earlier post, I am redoing my bathroom in a 1940's Hollywood inspired style. While I wait for everything to line up on the contractor end, I decided to work on some artwork.

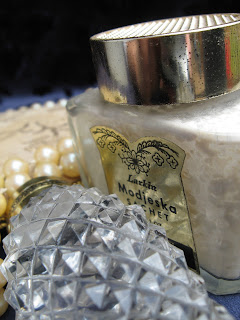
I love the look of vintage pieces, and I am fortunate enough to have inherited some really pretty items from my Great-Grandma. I display some of these things in my current bath. I thought it would be cool to take some close-ups some of these antiques and print them out as large-scale, black and white posters.

If any of you have any other ideas for ways to evoke a 1940's Hollywood style, please share them with me.

Other posts on my 1940s Hollywood Glam Bathroom:
The Early Plans
Photography of Everyday Objects 
Guest Post on Being Tazim

Friday, November 6, 2009

Vaction Day=Scrapbooking Day

Creating a Recipe Scrapbook

November for me is the beginning of the “dark months.” The leaves are down, the daylight hours shorten, the cold sets in, and the Christmas frenzy begins.

Usually I curl up and hibernate as much as my work schedule allows, but this year I am trying to keep the depression at bay in a different way. I am going to focus my energy on creating rather than sleeping.

Leah Piken Kolidas hosts an art challenge, Art Every Day Month. This challenge is helping me move my focus from fearing winter into something positive.

Today I am taking a vacation day from work to recharge and be creative. I’m laying out the recipe scrapbook that will be my mom’s Christmas present. I decided to work outside for a little while to allow myself to feel the sun.

It is 44 degrees, and I’m in my light winter coat, but I am basking in the delicate rays of an autumn sun. It is enough to tide me over until we hit the “Indian Summer” that out weatherman is calling for in the next few days.

Follow this project's progress: Beginning Steps

Wednesday, November 4, 2009

New Look


Today I was reading some of my favorite art blogs. They inspired me to try to add some visual life to my blog. Of course, thinking of myself more as a writer than an artist, I focused on the words when I launched this blog. Now I'm ready to spice up the design.

Unfortunately my web skills fall behind the ideas in my head, so I have opted for a simple banner until I can gain some new skills. My cat, Benjamin, participated in the photo shoot by eating some of the sprinkles and knocking the rest onto the floor. It may not be the most creative thing you've ever seen, but I had a good time working on it.


If you want to see some really creative blog backgrounds, check out Cute n Cool Blog Stuff.

By the way, this is day 4 of the Art Every Day Month challenge. So far I have been working on the recipe scrapbook for my mom. I hope to have some pictures soon, but tonight I took a break to do this instead.

Sunday, November 1, 2009

Family Recipe Scrapbook


November 1 is here—ushering in my first foray into the Art Every Day challenge. My big project for the month is creating a recipe scrapbook for my mom’s Christmas present.

Oh don’t worry. She won’t see this. She isn’t interested in anything that happens in cyberspace.

My mom is my biggest creative inspiration. She brought my sister and me into the world of crafting at an early age. She also finds great creativity in cooking, so I thought a recipe scrapbook would be the perfect way to thank her for opening up a world of creative expression.

Starting the recipe scrapbook project
I’ve taken photos of china that I inherited from my great-grandma and my grandma. I’ve also gathered up old photos and recipes. Next step is to figure out how it will all go together.

The photo above is a mock layout of what I think the final page design may look like. I’m going to print out the pieces and layer them on acid-free linen paper. I may even add some mixed media elements.

Please share any ideas or samples that might give me some inspiration. And wish me luck. The count down to Christmas has begun.

recomendations

share icons